How to connect Arduino Uno WiFi to ThingSpeak
- Arduino Uno WiFi with internet access
- ThingSpeak account with a configured channel
- Arduino IDE
- DHT22, raindrop and soil moisture sensors
1) What you need
DHT22 - Temperature/Humidity Sensor
MH-RD - Snow/Raindrop Detection Sensor
YL-69 - Soil Moisture Sensor
Arduino UNO WiFi connected to WiFI with internet access
Resistor 10k Ohm
Battery Pack
ThingSpeak Account with a channel configured
Any waterproof enclosure big enough to fit components
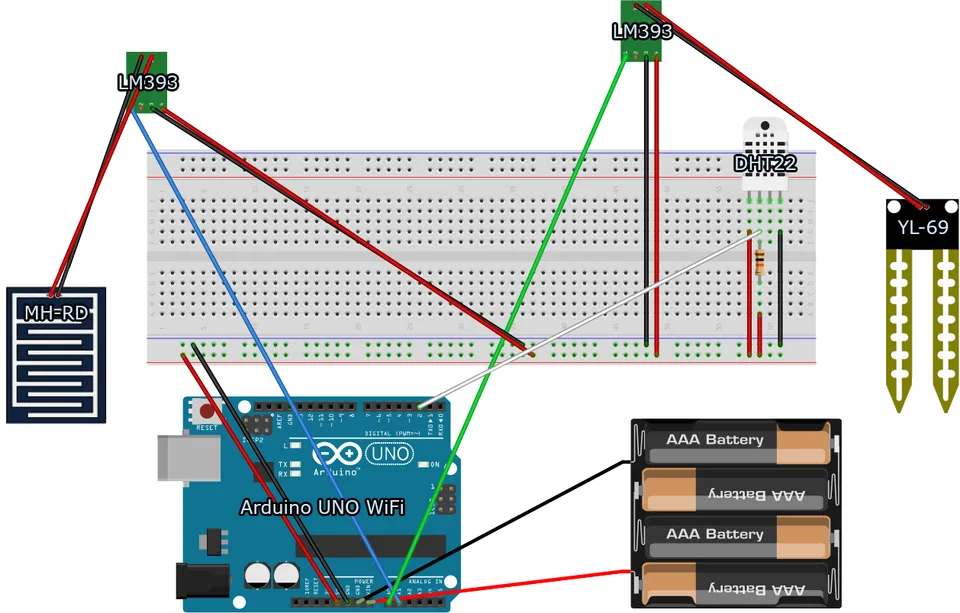
2) Fritzing Diagram

3) Sketch
a) After connecting all the sensors and cables as per the diagram above, open the Arduino IDE and copy and paste this into a new sketch.
#include <Wire.h>
#include <DHT.h>
#include <UnoWiFiDevEd.h>

#define CONNECTOR     "rest"
#define SERVER_ADDR   "api.thingspeak.com"
#define APIKEY_THINGSPEAK  "****************" //Insert your API Key

void setup() {
  Ciao.begin();
}

void loop() {
  DHT dht;
  dht.setup(2);

  String uri = "/update?api_key=";
  uri += APIKEY_THINGSPEAK;
  uri += "&field1=";
  uri += String(dht.getHumidity());
  uri += "&field2=";
  uri += String(dht.getTemperature());
  uri += "&field3=";
  uri += String(analogRead(A0));
  uri += "&field4=";
  uri += String(analogRead(A1));

  Ciao.println("Sending data on ThingSpeak Channel");
  CiaoData data = Ciao.write(CONNECTOR, SERVER_ADDR, uri);

  if (!data.isEmpty()){
    Ciao.println( "State: " + String (data.get(1)) );
    Ciao.println( "Response: " + String (data.get(2)) );
  }
  else{
    Ciao.println("Write Error");
  }
  delay(900000);
}
b) Change the ThingSpeak API to you channel API
c) Plug in Arduino Uno and hit CTRL+U to upload sketch to device
4) End Result
As data is streamed to ThingSpeak the online dashboard will populate these values to the graphs, here's mine http://thingspeak.com/channels/265283

Screenshot of ThingSpeak dashboard
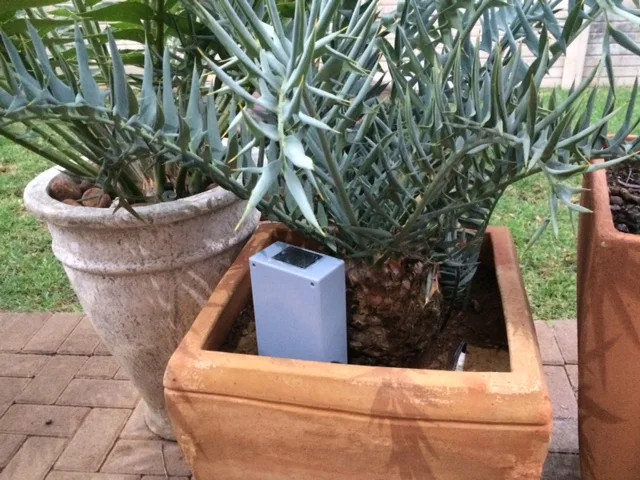
Enclosure and soil moisture sensor
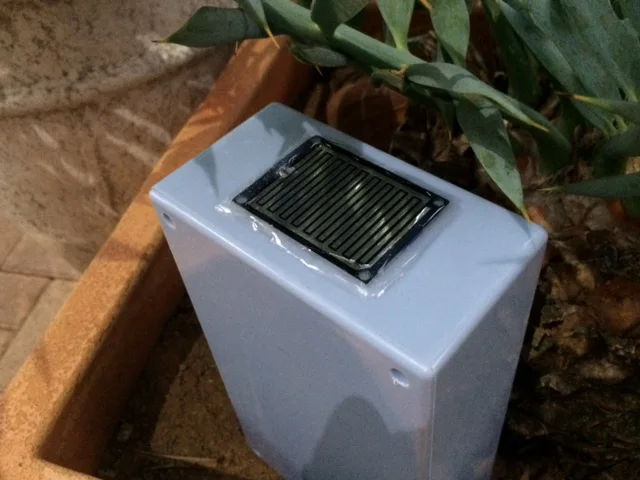
Closeup of enclosure
Closeup of soil moisture sensor
No comments yet
Comments are moderated and appear once approved.