SharePoint – Create a JSON Field Customizer Extension
INTRODUCTIONLink to this section
SharePoint Field Customizers are client-side components that run inside the context of a SharePoint page.
Currently, a React project is available out-of-the-box with the second option of "No JavaScript framework" for those ambitious enough to add their own preferred UI libraries.
SETUP YOUR DEVELOPMENT ENVIRONMENTLink to this section
This article is not going to go into the details on how to set up your development environment. A good article can be found at Set up your SharePoint Framework development environment.
My only recommendation is to use NVM for Windows instead of installing Node directly.
NVM allows you to install multiple versions of NodeJS and handles the heavy-lifting in swapping between them.
CREATE A FIELD CUSTOMIZER EXTENSIONLink to this section
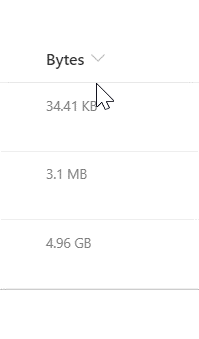
As part of the article, I will demonstrate how to create a Field Customizer Extension that will display human-readable file size from a number value stored in a SharePoint number column.
Follow these steps to create the Field Customizer Extension template project. These steps have been adapted from the Build your first Field Customizer tutorial.
1) Create a new project directory in a convenient location
md Bytes-Field-Extension2) Go to the project directory
cd Bytes-Field-Extension3) Run the Yeoman SharePoint Generator
yo @microsoft/sharepoint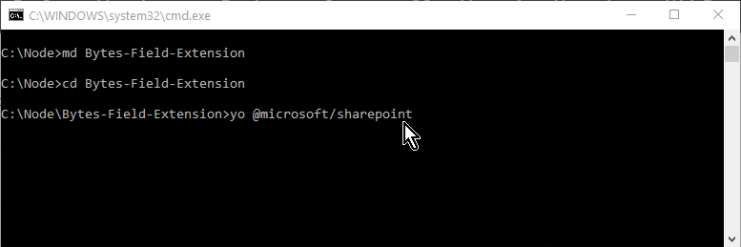
4) When prompted, enter the following values (select the default option for all prompts omitted below):
- What is your solution name?: bytes-field-extension
- Will the components in the solution require permissions to access web APIs that are unique and not shared with other components in the tenant?: No
- Which type of client-side component to create?: Extension
- Which type of client-side extension to create?: Field Customizer
- What is your Field Customizer name?: BytesFieldExtension
- What is your Field Customizer description?: Bytes Field Extension description
- Which framework would you like to use?: No JavaScript framework
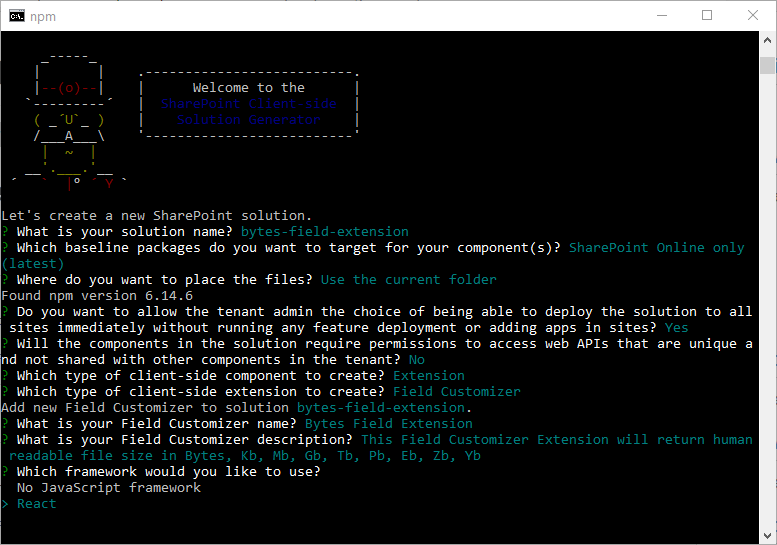
At this point, Yeoman installs the required dependencies and scaffolds the solution files along with the HelloWorld Field Customizer extension.
5) Install file-bytes-formatter React component
npm install file-bytes-formatter6) Type the following into the console to start Visual Studio Code or open project in your favourite editor
code .7) Within src\extensions\bytesFieldExtension\BytesFieldExtensionFieldCustomizer.ts add the following line below the existing imports
import Fsf from "file-bytes-formatter"This will make the file-bytes-formatter component available in your project.
8) Within src\extensions\bytesFieldExtension\BytesFieldExtensionFieldCustomizer.ts change this line
const text: string = `${this.properties.sampleText}: ${event.fieldValue}`;to
const text: string = `${Fsf(+(event.fieldValue).split(',').join(''))}`;This will parse the text from the SharePoint column through the file-bytes-formatter component. The extra code around it is to convert text to an integer and to remove any thousands separator.
PACKAGING FIELD CUSTOMIZER EXTENSIONLink to this section
9) Open a command prompt in the root of the project directory
Bundle the solution
gulp bundle --shipPackage the solution
gulp package-solution --shipDEPLOYING FIELD CUSTOMIZER EXTENSIONLink to this section
10) To deploy the Field Customizer Extension, a SharePoint App Catalog is required
a) Upload the .sppkg file, found in the sharepoint\solution directory of the project, to the App Catalog
b) In the Tenant App Catalog Site, go to the App Catalog list, select the file and click on Deploy
c) Once deployed, from the site to which the solution was deployed, open the PnP PowerShell module and run the following commands
Connect-PnPOnline -Url "https://YOURTENANT.sharepoint.com/sites/YOURSITE" -UseWebLogin$field = Get-PnPField -List "YOURLIST" -Identity "YOURFIELDNAME"$field.ClientSideComponentId = "YOURGUID"field.Update()Invoke-PnPQueryTEST FIELD CUSTOMIZER EXTENSIONLink to this section
If the deployment went well, you should see the field customizer in action.
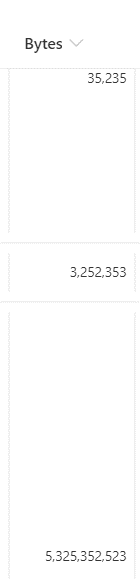
Looking at the JSON behind it, you can confirm that the source values are in bytes
CONCLUSIONLink to this section
I hope you found this tutorial useful. You are encouraged to ask questions, report any bugs or make any other comments about it below.
No comments yet
Comments are moderated and appear once approved.